The ISO in depth
Getting Started walks the installer’s seven questions.
This page is everything around them: writing the stick from Windows or macOS,
the two images and what each carries, answering the questions ahead of time,
what the installer leaves in /etc/nixos, and the caveats people hit. It used
to be the README’s install section, and moved here unchanged.
Writing the stick from Windows or macOS
Use balenaEtcher, and take the network image.
That combination has no wrong answer in it: Etcher only ever writes an image
byte-for-byte – no filesystem to choose, no partition scheme, no mode prompt –
and the network image is one file that needs no reassembly.
If you want the offline image on Windows, join the parts first. The /b is
load-bearing: without it copy treats them as text and stops at the first
0x1A byte, leaving a file that looks complete and is not.
copy /b PART-aa + PART-ab + PART-ac + PART-ad nixarchy.iso
certutil -hashfile nixarchy.iso SHA256
substituting the real names, and comparing that hash against SHA256SUMS
yourself – certutil will not read a sums file for you.
If you use Rufus instead, it will ask one question and its recommended
answer is the wrong one here; the next caveat explains why. Choose DD Image
mode.
Turn Secure Boot off in your firmware before booting the stick. This
project does not sign its bootloader, which is
a decision rather than an oversight.
Keeping Windows on the same disk? Free the space from inside Windows
first, and read the dual boot page –
it covers Shrink Volume, the 32 GiB floor the installer enforces, and why
BitLocker has to come off before you start.
Or build it yourself, which is the same image from the same commit:
nix build --extra-experimental-features 'nix-command flakes' \
  github:olafkfreund/nixarchy#iso
sudo dd if=result/iso/nixarchy-*.iso of=/dev/sdX bs=4M status=progress oflag=sync
The --extra-experimental-features flag is there because flakes are off by
default on a stock Nix, and a machine that has never run one is exactly the
machine someone builds an installer on. On NixOS with this module it is
redundant and harmless. Building on a non-NixOS host also needs the Nix
daemon running — systemctl enable --now nix-daemon.socket, and your user in
the nix-users group on Arch. If /nix/store is missing, the Nix install did
not finish; do not create it by hand, because a multi-user store wants
root:nixbld and mode 1775 rather than whatever mkdir leaves behind.
There are two images, and the difference is what they carry:
| |
Size |
Needs a network |
|
#iso |
5.6 GB |
no |
carries the desktop; installs by copying |
#iso-net |
1.5 GB |
yes |
downloads the desktop as it installs |
Take #iso unless the download is the thing you mind. It is the one the tests
boot every night, it works on a machine that has never had a network, and it is
faster once you have it. #iso-net is a quarter of the download and asks you
to get online first — its first screen offers Wi-Fi if there is no cable.
No boot menu, no login prompt: the installer is what comes up.
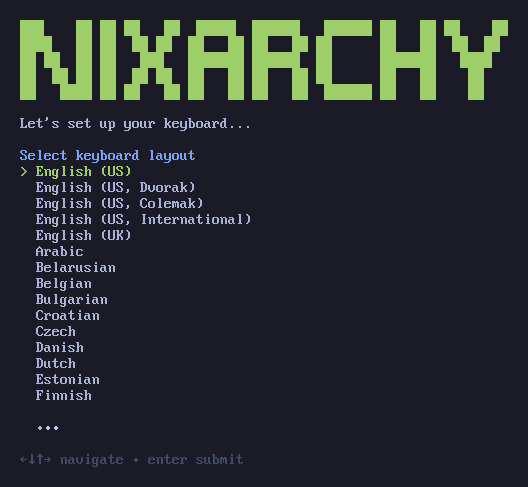
Keyboard, then your account, then the disk — step by step in the
manual. Encryption is on unless you press
Ctrl+C at the overwrite warning, and one password serves your user, root and the
disk alike.
Then it gets out of the way. The log goes to /var/log/nixarchy-install.log
rather than the screen, because a wall of store paths tells nobody anything they
can act on.

The whole install, four minutes at four-second intervals.
Measured, not estimated: checks.install reports the installer’s own figure
every run — around eight minutes in a VM with no network, and faster on real
hardware. The number on the finish screen is the same one.
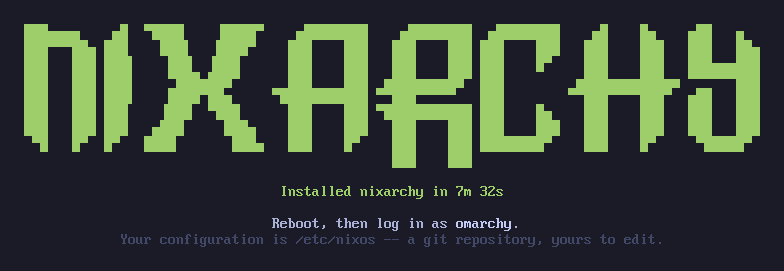
Reboot and you are at the desktop. An encrypted install goes straight there —
the passphrase you typed at boot already proved who you are, so there is no
second password.
#iso does not need a network. The image carries the desktop rather than
downloading it — 5.6 GB of ISO holding a 15.3 GB closure — so an install is a
store copy and an activation, not a download. Unplug the cable and it still
works; checks.install-iso proves that by installing with no network device
present at all. #iso-net trades exactly this away: it fetches the same
closure from nixarchy.cachix.org instead, which is why it is 1.5 GB rather
than 5.6, and why it stops at a Wi-Fi prompt on a machine with no cable. The 66 selectable apps are the exception, and are meant to be:
they come from the Install menu after first boot, from your own nixpkgs.
You can answer the questions ahead of time. `nixarchy-install –answers
` takes every answer from a file and asks nothing, which is how the VM
tests drive it and how you reinstall a machine the same way twice:
```
device=/dev/nvme0n1
encrypt=yes
luks_passphrase=...
hostname=kestrel
username=you
password=...
timezone=Europe/Copenhagen
keymap=us
```
`tests/install.nix` is the working reference for it.
**What you get is a flake you own.** `/etc/nixos` is a git repository holding a
`flake.nix`, the `disk-config.nix` that formatted the disk, the `flake.lock`
the image was built with — not a fresh one, because regenerating it would make
your first boot differ from what was actually installed — and your machine as
a directory under `hosts/`:
```
/etc/nixos
├── flake.nix finds machines by reading ./hosts
├── flake.lock
├── disk-config.nix
└── hosts/nixarchy/ default.nix, configuration.nix,
hardware-configuration.nix, nixarchy-apps.nix
```
A second machine is a second directory; `flake.nix` reads `./hosts` and there
is nothing in it to edit. `imports = [ ./nixarchy-apps.nix ];` is already
written for you: forgetting that line is the silent failure [the selection has to be imported](configuration#the-selection-has-to-be-imported)
warns about for machines you configure by hand, and the installer does not let
you make it. Edit it and run `nh os switch`. Nothing the installer did is
hidden from that directory, which is the point: a rebuild immediately after
install builds nothing, because everything it did is described there.
Installing a second machine from that same repository, and letting them keep
themselves current, is [many machines, one repo](many-machines).
**Five caveats worth knowing before you write the stick.**
**In Rufus, answer the ISOHybrid question with DD — not the recommended
default.** Rufus asks once:
> This image is an ISOHybrid image … Write in ISO Image mode (Recommended)
> / Write in DD Image mode
**ISO Image mode is the default and it is the wrong answer here**, and the
reason is a file size. The offline image contains one 5.8 GB file, the Nix
store it installs from, which is larger than FAT32 can hold -- so ISO mode
falls back to NTFS, and because UEFI firmware cannot boot NTFS, Rufus adds its
own bootloader to chain-load from it. *That* bootloader then tries to load this
image's GRUB modules, cannot parse them, and stops with:
```
kern/x86_64/dl.c:grub_arch_dl_relocate_symbols:114:
relocation 0x18d570 is not implemented yet
Aborted. Press any key to exit.
```
`0x18d570` is not a relocation type — real ones are small integers, and
`R_X86_64_64` is 1 — which is how you know the loader is reading modules from
a different build rather than that the download is corrupt. **Nothing is wrong
with the image.** It boots under UEFI whenever the firmware runs the
bootloader that is on it.
So: **DD Image mode**. The stick then looks empty or unreadable to Windows,
which is correct. [balenaEtcher](https://etcher.balena.io/) never asks — it
only does raw writes — so it is the safer choice if you would rather not have
to catch a dialog. On Linux, `dd` as above.
Tools that boot the image with their own loader are a different question, and
the honest answer is "sometimes". **Ventoy** does boot the offline image: a
tester's install log shows `NIXARCHY_4_0_2` mounted at `/iso` from Ventoy's
exfat partition, with the installer running and disko partitioning the disk.
So it is not in the same category as the NTFS shim above, and this text used to
say it was.
It is still not what to reach for first. Ventoy, unetbootin, YUMI, multiboot
sticks and "loopback this ISO" entries in an existing GRUB all interpose their
own loader between the firmware and ours, which is one more thing that can
differ between your machine and the one this was tested on -- and when it does
go wrong it goes wrong at boot, before there is anything to read a log from.
A raw write has no such layer. If Ventoy is already how you keep your sticks,
it is reasonable to try; if you are choosing now, choose the raw write.
Windows' own *Burn disc image* is for optical media and will not make a
bootable stick at all.
**It asks how to use the disk, and one of the answers erases it.** The first
screen offers a free-space install -- it keeps what is already on the drive and
takes only unallocated space, which is how you put this beside Windows -- and a
full-disk install, which does exactly what it says. There is still no partition
*editor*: free-space mode needs at least 32 GiB of contiguous unallocated space
that you made beforehand, with Windows' own Disk Management or `gparted`, and
it refuses rather than shrinking anything itself.
Full-disk mode is one file, `installer/disk-config.nix`, run against the disk
you name. Anything already there is gone.
Making that space is a Windows job and is done before you boot the stick:
[the dual boot page](dual-boot-install) covers Shrink Volume,
the 32 GiB floor, Fast Startup, and BitLocker.
It is **UEFI only** — the layout is an ESP with systemd-boot, and there is no
BIOS path.
**`x86_64-linux` only.** Nothing else is built or tested.
And if you encrypt, **the passphrase prompt at boot comes before Bluetooth
exists**. A wireless keyboard that pairs after the desktop is up cannot type
into the initrd, so the machine sits there waiting for a key you have no way to
press. Upstream's manual carries the same warning because people hit it. Use a
wired keyboard for the first boot, or do not encrypt.